
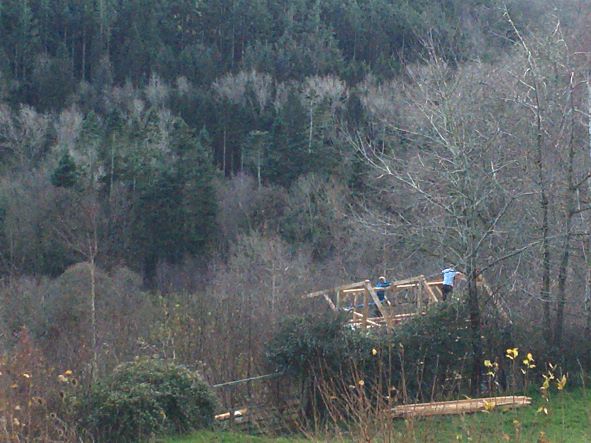
While I’m at Bron Haul we’ve taken on a timber framing project, using partially wood grown in our own woodlands. The larger pieces were sourced from a local mill but for the smaller ones we felled some of our larger larch trees and had them taken to the mill for sawing. Once we had our timber in the yard and a set of plans for the 6 layouts of the frame, could begin individually constructing each layout.
The start of a layout
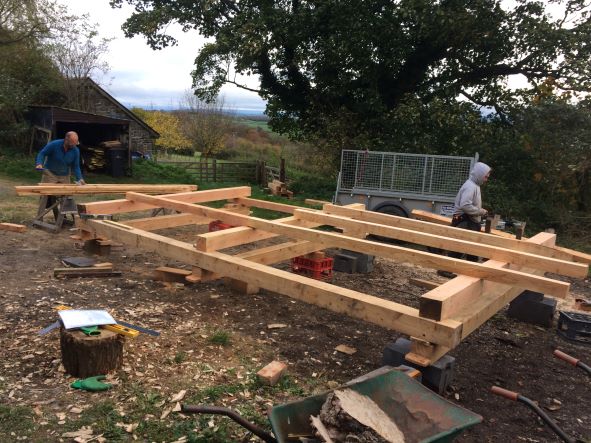
For each layout we followed a step-by-step process which started with having the timbers at approximate sizes and piling them on top of each other to match the plan. By using spirit levels, blocks and wedges we make each piece level once it is square and in place. The whole piled up structure should then be level and the joints can be marked. For this, we used a spirit level to mark where the outside of the mortises will be and the face onto where the tenon shoulders need to be cut. Each of the posts are numbered and the timbers jointed into the posts are marked with this number.
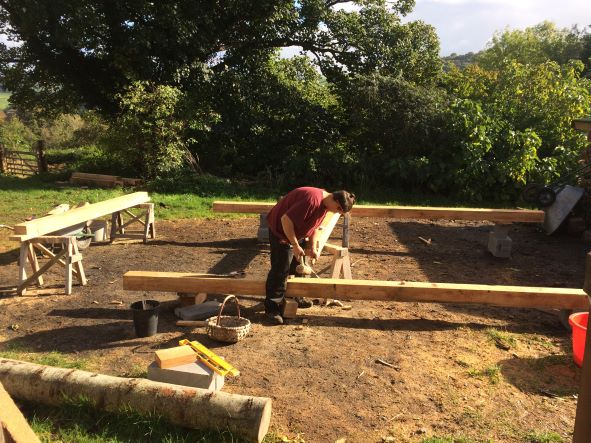
Chopping out tenons by hand
Once the mortises, tenons and numbers are all marked the timbers can be removed for cutting. For this frame it was important which side would be a flush face, and the tenons must all be marked consistently to fit that. With the tenons cut and the mortises carved and with peg holes drilled through, we then slot each piece into its mortise individually to check they all fit. With all of the tenons receiving a tick we then assemble the whole layout and pull it together to fit. This is where problems with the joints are fixed; whether tenons are too long or drafting is needed or if anything needs adjusting.
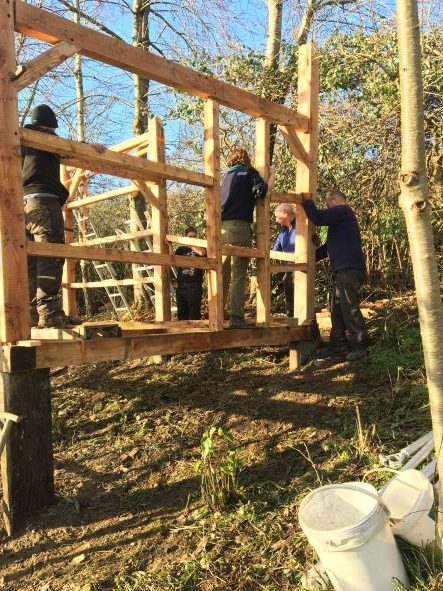
All hands on assembling the frame!
Once the layout seems up to standard, we use the peg holes in the mortices as a guide to put a mark on the tenons. From this mark we will make a peg hole in the tenon that is slightly closer to the shoulder to create a ‘draw bore’ effect which pulls the joints tighter together. To drill these holes, we have to take the whole layout apart and from there we stack it and move onto the next one. However often we have used the level surface of the previous layout as a surface on which to present the next one before deconstruction.

Securing the joints with sweet chestnut pegs
As of now we’ve begun the groundworks putting in short posts that will hold the weight from under the sill of the principal posts. These have also been levelled and we are ready to start putting our sill together and after that the frame will be constructed. The joins in the frame are held together with wooden pegs made from sweet chestnut that we have cleaved and whittled down using drawknives. They are made to a standard fit and the pegs are given a chance to dry and season so that the pegs themselves don’t shrink with time.